 |
| Step by Step rooting guide for Karbonn A1+ |
Because of it's damn low price, I guess this is your first Android device. And if that is the case, you must know about What Rooting is and what cool things you can do once you root your Android smartphone.
Let's begin with the rooting process now.
Disclaimer: Only you are responsible for damaging your device in any way during or after following this guide.
- Enable USB Debugging. You can do that by opening Settings, then going to applications, then development and finally clicking on USB Debugging. (This is not of any use for this guide, it's just one of the things you must do on your android for safety, in case anything goes wrong.)
- Download Z4root apk from here.
- Copy this file to your sdcard.
- Install this application. An option saying that you must allow installation from non-market sources may pop up. Go to settings and enable Unknown Sources in that case.
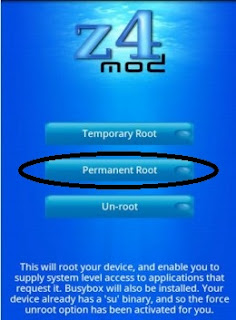
- Open the application and click on permanent root.
- Your phone will reboot in a while and you can now play with your rooted phone!

Though Z4Root was meant for 2.2 devices only but this method has been confirmed working on xda. Leave your feedback below. To stay connected with us for more interesting updates, follow us!


